Want to See Arches in Colorado? The Ultimate Guide to Rattlesnake Arches Hike
Colorado’s Rattlesnake Arches are the second-highest concentration of rock arch formations in the world, yet a hike in this remote and forbidding wilderness might make you think you’re the first person to ever discover the 35 arches in this part of McInnis Canyons National Conservation Area. Rattlesnake Arches is one of the most bucket list-worthy hikes in Colorado, but most people will never see them.
Part of how Rattlesnake Canyon Arches have remained lesser-known is because they are incredibly hard to get to. Moreover, there is not a ton of information out there about how to get to the trailheads for Rattlesnake Arches or how long the hikes are. It made planning for the Rattlesnake Arches hike tricky. That’s why we wrote this detailed hiking trail guide to Rattlesnake Arches! It’s so important for your safety to be prepared for hot and arid desert hiking. We think this guide to Rattlesnake Arches is the very best one on the internet, and we hope it makes it easy to plan your own Rattlesnake Arches trek!
Rattlesnake Canyon Arches Geology
Rattlesnake Canyon, in the northern end of Western Colorado’s Uncompahgre Plateau, is home to a whopping 35 natural arches, forming the world’s second-largest concentration of rock arches outside of Arches National Park. The Entrada sandstone that comprises the arches was deposited over 175 million years ago as sand dunes along an ancient coastline. It’s hard to imagine this desert environment, now part of the 123,400 acres McInnis Canyons National Conservation Area, once being underwater, but it was an inland sea! Over time the sea disappeared, exposing the sandstone to wind and dirt which eroded alcoves into the sandstone. These alcoves ultimately become the amazing arches you can see in Rattlesnake Canyon today.
Rattlesnake Canyon Arches Flora and Fauna
The high-desert ecosystem of Rattlesnake Canyon makes it home to pinon pines, junipers, sagebrush, cacti, and yucca. The most common animals hikers see are mule deer, coyotes, bighorn sheep, foxes, rabbits, lizards, and (rarely) rattlesnakes. Above you, turkey vultures, golden eagles, and hawks fly above the canyon walls.
Hiking Rattlesnake Arches
There are 3 general hiking options in Rattlesnake Canyon, two of which require a 13-mile drive on a rough dirt and rock road in a high-clearance 4×4 vehicle. The third option can be reached in a normal vehicle, but is a much longer hike to see the arches. We describe all the ways of exploring Rattlesnake Arches below!
Rattlesnake Arches via Black Ridge Access Road (4×4 required)
To get to the Rattlesnake Arches trailhead via Black Ridge Access Road, you must drive for 13 miles on a rough dirt road west of Colorado National Monument. Again, it bears repeating that a high-clearance 4×4 vehicle is required for this drive! You won’t make it very far without one! There are plenty of sharp rocks and some deep sand on the road, so getting stuck is a real risk. The last two miles in particular are incredibly rocky. We actually ended up parking our 4×4 high clearance Sprinter van about a mile from the trailhead and walking the rest of the way because the road was too rough for our bulky vehicle to traverse safely. If it’s been raining, snowing, or the road is wet, definitely don’t attempt this drive!

Getting to the Rattlesnake Arches Trailhead via Black Ridge Access Road
Getting to the Rattlesnake Arches trailhead via Black Ridge Access Road is kind of confusing, and Google Maps can and will mislead you onto private property. Make sure to follow these instructions or even print them out and take them with you to avoid any issues! Plan for 1-2 hours for this drive.
- Enter Colorado National Monument at the west entrance near Fruita. Note that you will need to pay the entrance fee for the Monument (or use your America the Beautiful Pass).
- Drive 11 miles and turn right at 16.5 Road (also called the Glade Park turn-off)
- A short 0.2 miles later you will see the Black Ridge Access Road on your right next to the sign for McInnis Canyons National Conservation Area. Take this road!
- From here, it is 13 miles to the trailhead. This is where the road is super rough and rocky! Drive carefully!
- Eventually, you will see a split off for an upper and a lower access road. The upper access road is open from April 15 to August 15. The lower access road is open from August 15 to February 15. Just take whichever road is open on the date you are visiting! NOTE: Neither road is open from February 15 to April 15!
Upper Rattlesnake Arches Trail Description
3.8 miles round trip
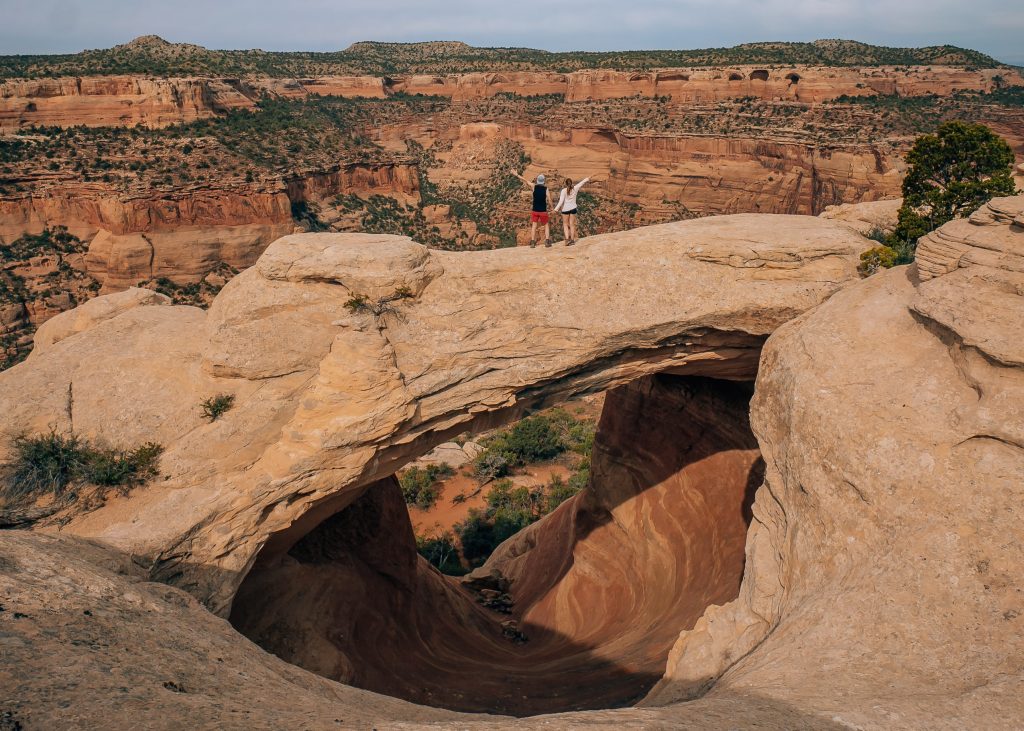
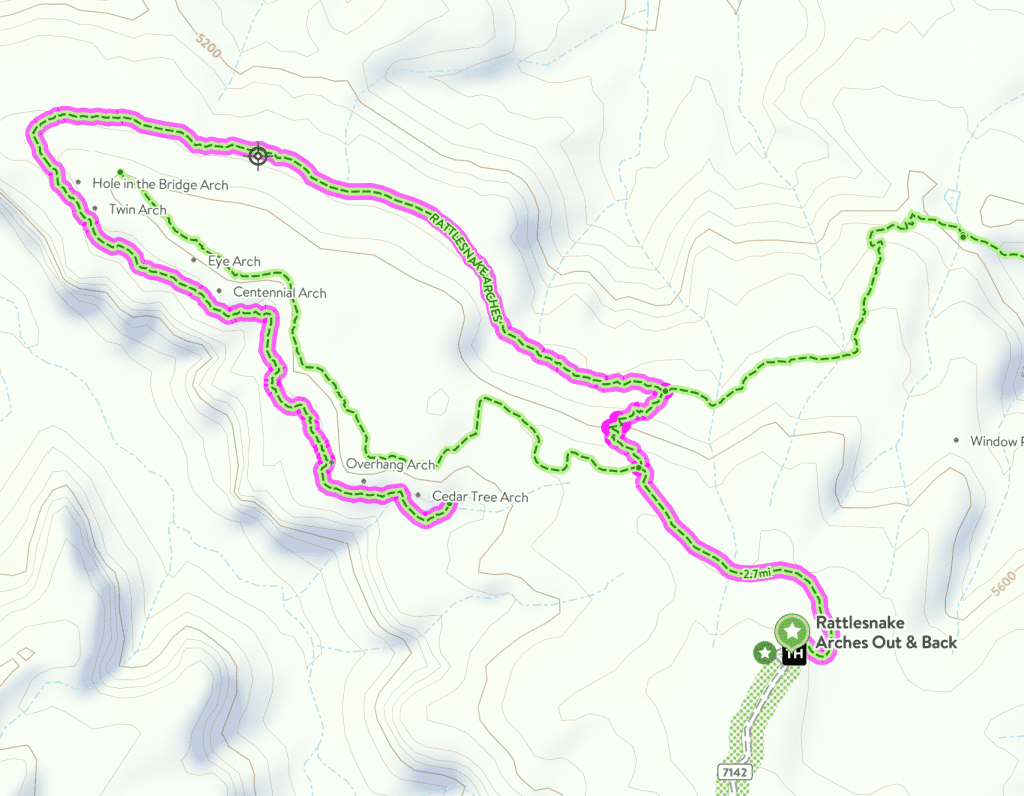
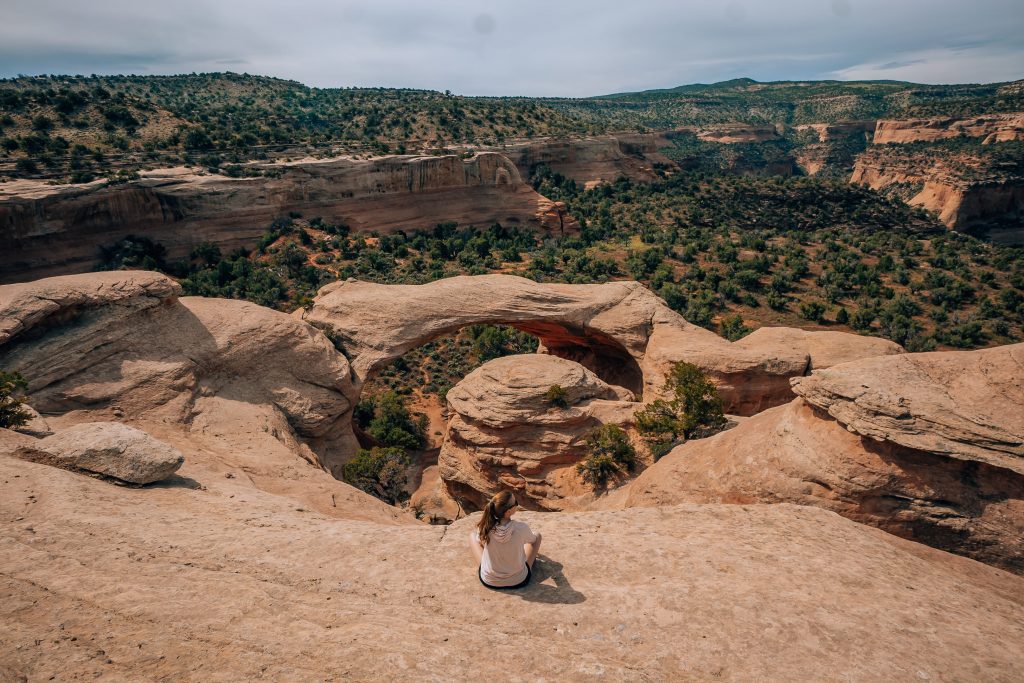
This is the hike we did when we visited Rattlesnake Arches. It is so cool seeing the arches from above rather than the usual vantage point (from below) you get a lot at Arches National Park for example! In the map below, this route is the green line running parallel to a purple line.
The Upper Trail through the Rattlesnake Canyon Arches is fairly flat with just 400 feet of elevation change. Most of the elevation is at the beginning of the hike as you descend a bit toward the canyon. You will hike back the same way you came, so you will go uphill at the end of your round-trip hike. Otherwise, it’s an easy trail along the canyon’s edge.
The Rattlesnake Arches via Upper Trail
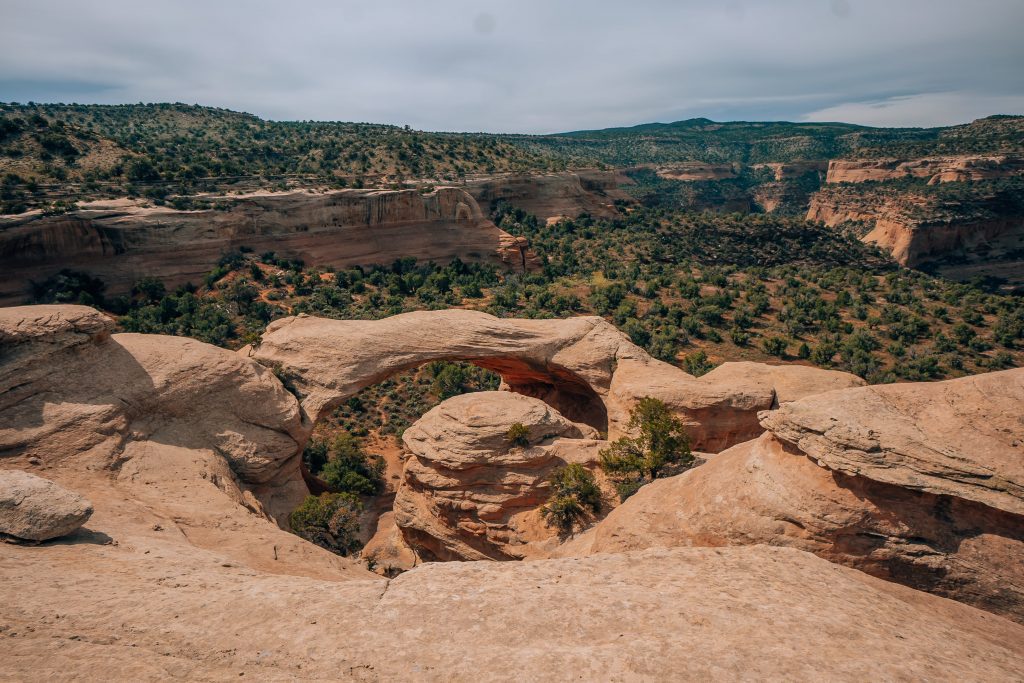
The first arch you will arrive to is the Cedar Arch (also known as the Rainbow Arch). It spans 76 feet across the canyon floor, standing 43 feet high.


The next notable arch is the East Rim Arch (also known as Akiti or Centennial Arch) which spans 40 feet across and is 120 feet tall. This is truly one of the most dramatic arches you can see on the Upper Rattlesnake Arches trail!
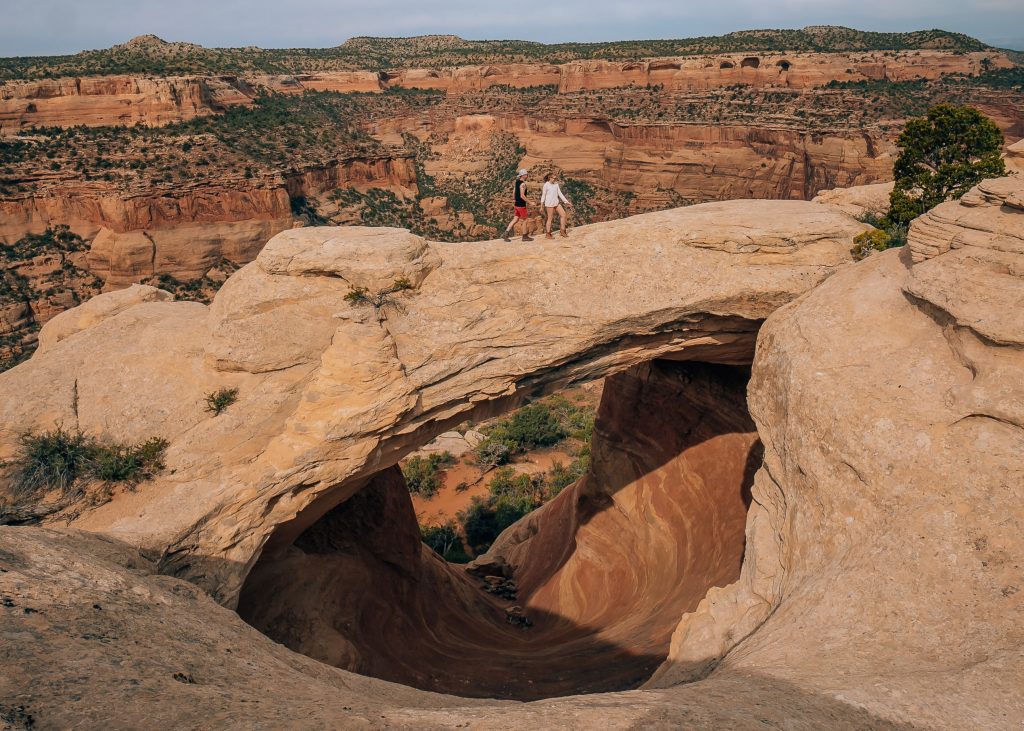
The last arch you will see on the Upper Trail is the Bridge Arch (which is also called Hole-in-the-Bridge Arch due to the literal hole in the middle of it) spans 40 feet across and 30 feet high.
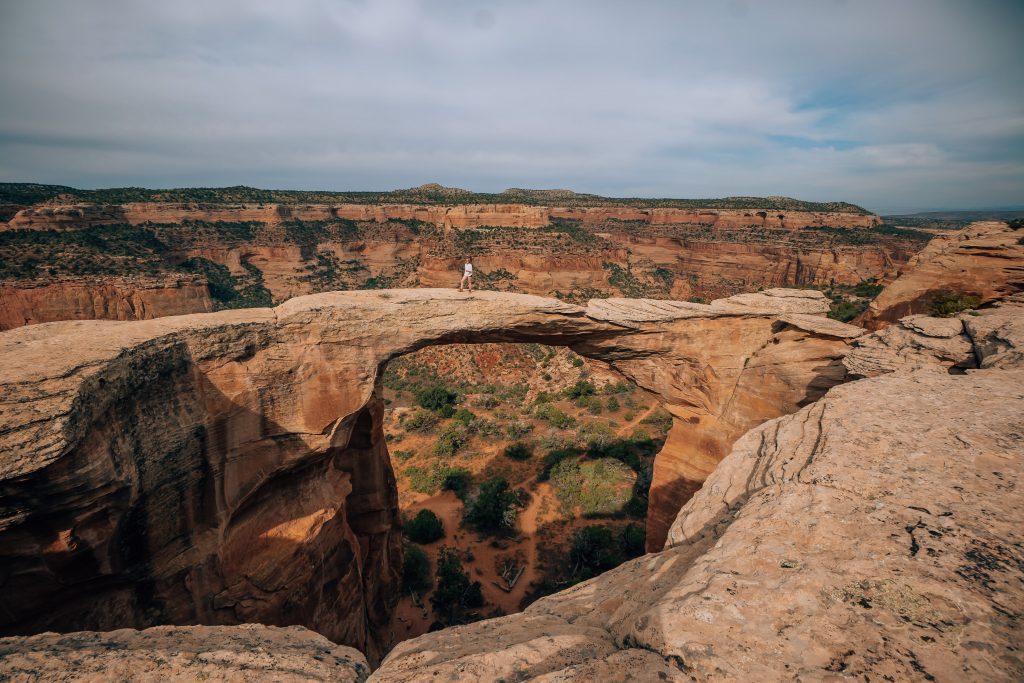
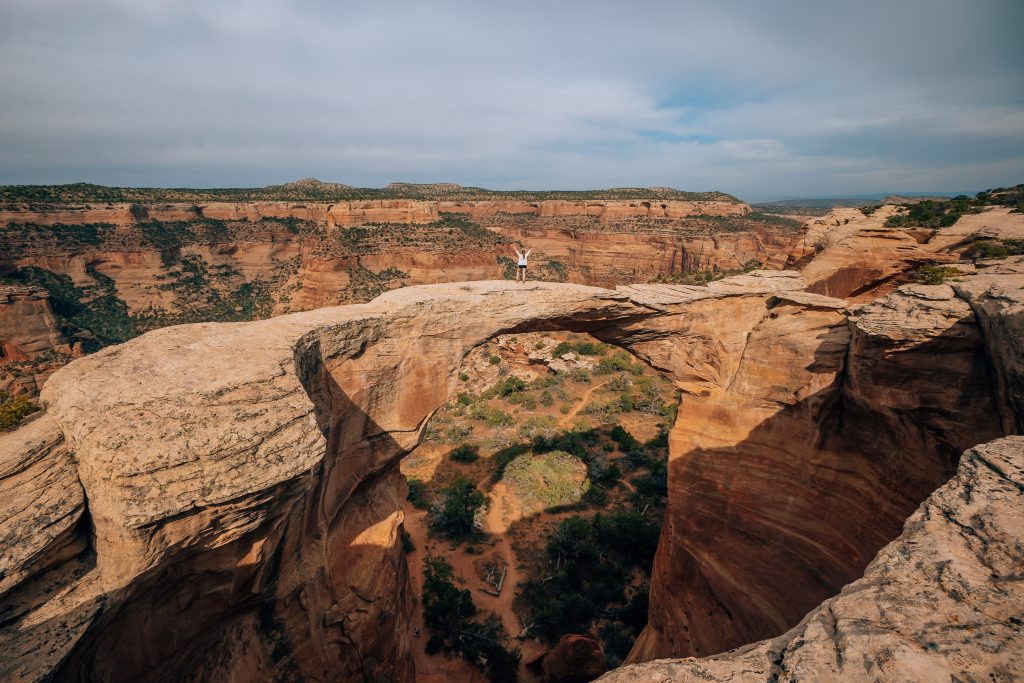
Is it safe to walk across the Rattlesnake Arches?
You can get as close to or stay as far from the arches as you want. You can also walk across some of the natural rock bridges if you dare. Just be cautious! Although the arches are wider than the photos make them look, you still need to be very sure of your footing. A fall from Rattlesnake Arches would mean certain death.
Lower Rattlesnake Arches Trail Description
5.4 miles round trip
To take the Lower Rattlesnake Arches trail, you will start the same as if you were taking the Upper trail. About a half mile in, you just need to take the trail that descends down a steep but short 0.2-mile section of trail. In the map below, this is the purple route.
Turn left at the sign after your descent. This will put you on the Lower Rattlesnake Arches trail. You will see some signage that will let you know you’re in the right place! This part of the trail ends 2.2 miles later beneath the Cedar Tree Arch, after first passing beneath six other arches.
The Rattlesnake Arches via Lower Trail
The first arch you will come to on this route is the Bridge Arch (or Hole-in-the-Bridge Arch), notable for its literal hole in the arch. Right next to this arch is Twin Arch. The next note-worthy arch you will see is the Eye Arch, which looks like a small eye in the rock.
Soon, you will come to East Rim Arch (Centennial Arch). This is the most impressive-looking of the Rattlesnake Arches from the lower trail!
Next, you will see Overhanging Arch and Trap Arch, both easy to miss if you aren’t looking!
Lastly, you’ll arrive at the Cedar Tree Arch.
From the Cedar Tree Arch, turn back around and hike back the way you came. At the junction for the Upper Rattlesnake Canyon Trailhead, turn right to add this additional hike onto your route. Otherwise, continue straight back to where you parked.
Optional Rattlesnake Arches Loop Route
While you can technically climb up through Cedar Tree Arch to connect the lower and upper trails, we don’t recommend it. It’s very sketchy and steep as you climb on the rock. We started to head down it and quickly backtracked when we realized it was beyond our comfort level without any satellite or cell phone reception. But, technically it is an option and would be a shorter way of seeing both the upper and lower trails in the Rattlesnake Canyon Arches.
Rattlesnake Arches via Pollack Bench Trailhead
The third way of seeing the Rattlesnake Arches is to park at the Pollack Bench Trailhead and complete the 14-15 miles round trip hike from there via the Pollack Bench Trail.
Getting to the Pollack Bench Trailhead
The Pollack Bench Trailhead avoids the 4×4 route entirely and requires a much longer hike to the Rattlesnake Canyon Arches and back. But if you have the endurance and sufficient water and food, it’s a great way to avoid a rough drive and spend more time outdoors.
The Pollack Bench Trailhead is near Fruita, along the Colorado River on 1 1/2 Road. It’s a half-hour drive from downtown Grand Junction, entirely on good roads. From I-70, take the Fruita exit. You will drive through a subdivision called Kingsview Estate. When the road turns to gravel, turn left and proceed for about 3.5 miles to the parking area, which will be on your left.
You do NOT need to enter Colorado National Monument to get to Pollack Bench Trailhead, which means you can avoid the $25 Monument entrance fee by option for the Pollack Bench Trailhead option to see Rattlesnake Arches.
Fun Fact: What’s a “Bench” Anyway?
In geological terms, a bench just refers to the circular wooded area on top of the canyon walls.


Rattlesnake Arches Trail Description from Pollack Bench
14-15 miles roundtrip
The trek to Rattlesnake Canyon Arches from Pollack Bench Trailhead is a strenuous hike through the canyons. It requires scrambling up rock slabs as you meander among spires and hoodoos before ultimately arriving 5 miles later at the Rattlesnake Canyon Arches.
This is where the trail from Pollack Bench syncs up with the Rattlesnake Canyon Arches Trail. For a 4-mile round trip hike to and from this junction, you can hike the Lower Rattlesnake Arches Trail. For an even longer hike, you can add on the Upper Rattlesnake Arches Trail for the most comprehensive adventure at the Rattlesnake Arches!
Pro Tip
Add a half-mile side trip down the Pollock Bench to Window Rock Tower (Aztec Arch) to see an additional arch!


What to Bring to Rattlesnake Arches
- National Parks Pass (optional): If you plan to visit multiple national parks in a 12-month period, we highly recommend buying a National Parks Pass like America the Great Pass. We get one every year because it covers entry fees for more than 2,000 locations under the US National Park Service. You DO NOT need to enter Colorado National Monument if you are parking at the Pollack Bench Trailhead, but if you are taking Black Ridge Access Road, you will need to enter the Monument and pay the $25 admission OR use a parks pass like this one.
- Water bottle: It’s so important to stay hydrated. This REI water bottle comes in so many fun patterns and is a great size for carrying with you on a scenic drive. We also like to bring at least one large gallon jug of water for big driving days, like the intense 4×4 Black Ridge Access Road. Lastly, make sure your daypack has a water reservoir in it!
- Sun Protection: This is so important even if you are spending most of the day in the car! Sun Bum is our favorite sunscreen brand.
- Sunglasses: I love these wooden frame sunglasses, so they are my go-to.
- Snacks: Clif Energy Bars are our favorite travel snack, for a good mix of carbs, fats, and protein to power us through big days!
- Day Pack: It’s so helpful to have a good day pack to carry everything you need. I’ve had the Osprey Skimmer 20 for Women for years and it’s held up on every adventure! And here’s the Osprey Talon 22 Pack for Men!
- Water Reservoir: If your day pack doesn’t have a water reservoir in it already, you can buy one separately to slip into your bag. It’s absolutely NECESSARY that you bring water with you on every hike. Here are our favorite 2-liter reservoir and 3-liter reservoir!
- Hiking Boots: I hiked Rattlesnake Arches in my Columbia hiking boots. I literally have these in multiple colors because I love them so much! You can’t beat the price for the quality, too. Tim always hikes in his Foxelli boots and swears they are the best hiking boots he’s ever owned. He also has multiple pairs on stand-by in his closet for when the tread on these finally wears out (though it’s been a few years and they are still going strong!).
- Socks: I started wearing these double-layer Wrightsock brand socks when marathon training years ago and have never gotten a blister with them! In winter, I might mix it up with merino wool socks, too.
- Hiking pants: These hiking leggings are my favorite in winter. In summer, I usually hike in biker shorts or leggings.
- First Aid Kit: An ultralight first aid kit is a must-have for every hike. You never know what can happen, and you’ll be glad to have a first aid kit if you need one!
- Camera: I always hike with my Sony a7iii. It’s a great full-frame camera for capturing all of our hiking memories!
- Snacks: Clif Energy Bars are our favorite hiking snack. It’s got the perfect mix of carbs, fats, and protein to power us through our hikes!
- Satellite Communicator: We feel safe carrying our Garmin InReach on hikes because we know even without cell phone service we can use our satellite communicator to call for help if needed.
- Map: We recommend having a McInnis Canyons National Recreation Area map with you.

Rattlesnake Arches Safety Information
It’s important to understand how utterly wild the McInnis Canyon National Conservation Area and Rattlesnake Arches area is. Even though it’s only 20 miles from the city of Grand Junction, Colorado, it really can’t be more remote. This means traveling here has inherent safety risks like getting lost, dehydrated, and being unable to call for help due to no cell phone reception. This is where having a satellite communicator can be life-saving!
We DO NOT recommend hiking Rattlesnake Arches in the summer because of the extreme heat. Regardless of the season, be sure to wear a hat and sunscreen at Rattlesnake Arches, and have at least 2 liters of water with you on the hike. Keep even more water in your car. Hydration powder is also a good idea to stave off dehydration.
You should also be sure to download a map of the trail on COTREX or AllTrails, and consider carrying a paper map like this McInnis Canyons National Conservation Area map.
It’s also worth noting that while dogs are technically “allowed” to hike Rattlesnake Arches, the terrain makes it highly not recommended for dogs for their own safety.
Where to Stay Near Rattlesnake Arches
There are a lot of options for where to stay near Rattlesnake Arches. The towns of Palisade, Grand Junction, and Fruita are all good options just outside McInnis Canyon National Conservation Area.
Hotels in Fruita, Palisade, and Grand Junction
Fruita, Palisade, and Grand Junction are all excellent bases for a trip to Rattlesnake Arches. Fruita and Grand Junction hug either end of Colorado National Monument, and Palisade is just outside Grand Junction and a great choice for those who want to see Colorado’s wine country as well.
Grand Junction Hotels
- Hotel Maverick
- Courtyard by Marriott Grand Junction
- SpringHill Suites by Marriott Grand Junction Downtown/Historic Main St.
- Fairfield Inn and Suites by Marriott Grand Junction Downtown
- Days Inn by Wyndham Grand Junction
Palisade/Wine Country Hotels
Fruita Hotels

Camping at Rattlesnake Arches
There is no camping allowed within a quarter mile of the Rattlesnake Arches trail, or along Black Ridge Access Road to the trailhead. Additionally, the parking at the trailhead is for day use only. You can read more about the rules regarding camping in McInnis Canyons National Recreation Area on the BLM website.


Final Thoughts on the Rattlesnake Arches Hike
There you have it! The ultimate guide to hiking to Rattlesnake Arches! We hope you love this remote part of Colorado as much as we do. Please remember to respect this land by packing out everything you bring in and always following the principles of Leave No Trace.
If you are spending some time in Grand Junction, make sure to spend at least one day exploring Colorado National Monument, including hiking to Devils Kitchen and Coke Ovens!